The DIY Tool Kit a First Home Actually Needs
What to buy first, what to buy well, and what to rent. HomePlusDeals.Com on starter tools, battery platforms and the safety gear worth paying for.
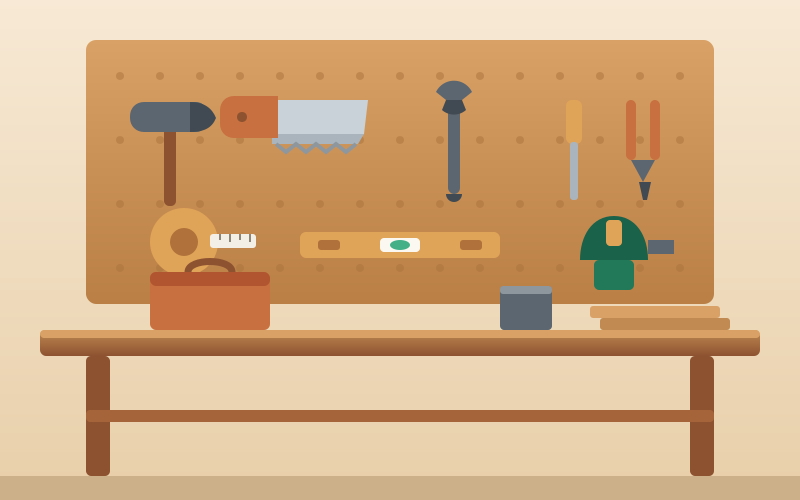
The 137-piece kit in the blister pack is the wrong answer: mostly sockets you will never use, a hollow-handle screwdriver that rounds off the first screw it meets, and a tape measure whose blade folds at 4 feet. You will buy a proper drill a fortnight later, having spent the money twice.
A first home needs about a dozen tools to cover the first two years: hanging things, tightening things, stopping drips, patching walls, swapping fixtures. The rest waits until a job demands it. Of all the project budgets we track on HomePlusDeals.Com, the tool kit is where spending less up front reliably costs more later — but only on about four items. The other eight can be cheap with no consequence at all.
The twelve tools that cover the first two years
Measuring and marking
A 25-foot tape measure with a 1-inch-wide blade. Width matters more than length: a 1-inch blade holds roughly 7 to 11 feet of unsupported standout, so you can measure a wall alone, where a 3/4-inch blade folds at half that. You will use it constantly to find studs at 16 inches on centre — 24 inches in some newer framing and most garages.
A 24-inch box level and a 9-inch torpedo level. The box level handles shelves, pictures and cabinet runs; the torpedo fits inside a vanity where the big one will not. Skip the 48-inch until you hang a door.
A utility knife with replaceable blades. Change the blade more often than feels reasonable: a dull knife slips, and that is how people cut themselves.
Driving, fastening and fixing
An 18V/20V-class cordless drill/driver, a twist bit set from 1/16 to 1/4 inch, and a spade or step bit for anything larger. Pilot holes are not optional in hardwood or near board edges — a 1/8-inch pilot for a #8 wood screw in softwood stops the split before it starts.
A #2 Phillips screwdriver, a medium flat-blade and a set of hex keys. The #2 Phillips does most of the fastener work in a modern house, so buy that one properly.
Tongue-and-groove pliers (10-inch) and an adjustable wrench (10-inch) between them handle supply lines, P-traps, hose bibs and the compression fitting under the sink that always weeps.
A claw hammer at 16 ounces. Heavier is not better: a 20-ounce framing hammer punishes inaccuracy.
A dripless caulk gun. Check the thrust ratio stamped on the frame: 10:1 is fine for bathroom and kitchen caulk, 26:1 if you will ever push construction adhesive. A $6 gun exhausts your hand halfway down a bathtub.
A non-contact voltage tester, covered below, and a 6-foot fibreglass step ladder — fibreglass rather than aluminium, because you will eventually use it near a light fixture.
Bought sensibly that list lands around $350 to $600, depending on the drill and what you catch on sale. Roughly the low end of the $500 to $2,500 kitchen refresh band we publish on HomePlusDeals.Com, and unlike a refresh it does not wear out in a decade.
Buy well, buy cheap, or rent
The useful distinction is not price, it is how the tool fails. Slow wear can be cheap. Ruined work, or an injury, cannot.
| Tool | Verdict | Why | Typical spend |
|---|---|---|---|
| Drill/driver | Buy well | Clutch accuracy and chuck runout decide whether screws strip | $90 – $180 |
| Tape measure | Buy well | Blade standout and a tight hook are the whole job | $20 – $35 |
| Levels | Buy well | A cheap vial reads level when it is not, and you cannot tell | $30 – $60 pair |
| #2 screwdriver | Buy well | Tip hardness prevents cam-out and rounded screw heads | $10 – $20 |
| Hammer, hex keys, knife | Buy cheap | Failure mode is slow wear, not ruined work | $30 – $50 total |
| Pliers, adjustable wrench | Buy mid | Jaw slop rounds off fittings; mid-range is plenty | $35 – $60 |
| Circular or mitre saw | Wait | Buy the day a project needs it, not before | — |
| Floor sander, tile saw, SDS hammer | Rent | Days of use in a lifetime; storage is the real cost | $40 – $90 per day |
| Drain auger, carpet stretcher, steamer | Rent | Single-use specialists | $25 – $60 per day |
Rental figures are typical ranges and move with region and shop. Ask whether a day means 24 hours or one business day — a Saturday-morning pickup on a four-hour rate is often cheaper. Renting also puts a professional machine in your hands for the jobs where quality shows, which is why it is the right call for flooring projects in almost every room: a rented sander or tile saw beats anything you would buy at the same cost.
Corded versus cordless, and the platform trap
Cordless has won for drilling, driving and light cutting, not for anything running under sustained load — a big mitre saw, a bench grinder, a shop vacuum, a floor sander. Keep one 50-foot, 12-gauge extension cord for those; a thin 16-gauge cord at that length drops enough voltage to run a motor hot.
The real decision is the platform, not the tool. Batteries only fit their own maker’s system, so your second and third purchases are locked in the day you buy the first. Pick one 18V/20V-class line and stay on it. Switching later means buying batteries and a charger again — usually $120 to $200 of pure waste.
Reading the numbers on the battery
- Volts is roughly power. “20V max” and “18V” describe the same class of battery: 20V is the peak reading at no load, 18V the nominal running voltage. A labelling convention, not a performance gap.
- Amp-hours (Ah) is runtime, and it tracks weight. A 2.0 Ah pack is light and right for overhead work. A 4.0 or 5.0 Ah pack runs longer and holds voltage better under load, which matters for hole saws and large bits, but it turns a drill into a club at ceiling height.
Buy the kit with two batteries if the gap is under about $40: one compact, one large is the ideal pairing, and cheaper than adding a pack later.
Drill or impact driver?
Start with the drill/driver; the impact driver is the second purchase. It delivers far more rotational force through hammer blows rather than steady torque — transformative for long deck screws and lag bolts, and completely wrong for anything delicate. It will snap a small brass screw.
Safety gear that is genuinely non-negotiable
Eyes, ears, lungs, electricity.
Safety glasses marked ANSI Z87.1 — stamped on the lens or temple, and the line between impact-rated protection and a fashion item. Buy three pairs and leave them where the work happens; the pair in a drawer downstairs does not count.
Hearing protection for anything with a motor and a blade. The Noise Reduction Rating on the packet tells you what attenuation you are buying.
A respirator, not a dust mask. A loose nuisance mask does very little against fine dust. An N95 is the sensible minimum for general sanding; a P100 cartridge respirator is what you want for old paint, silica dust from cutting masonry or tile, or insulation.
Old paint changes the rules entirely
If the house was built before 1978, assume lead paint until proven otherwise. EPA’s guidance on reducing lead exposure at home states that approximately three-quarters of US homes built before 1978 still contain some lead-based paint, and advises plainly that you should not attempt to remove lead-based paint yourself.
There is a legal line too. EPA’s interpretation of minor repair and maintenance activities sets the threshold at 6 square feet of painted surface per room indoors and 20 square feet outdoors, counts replacing a window of any size as a renovation rather than minor maintenance, and treats jobs in the same room within 30 days as one job. That governs paid renovators, but it is a sound personal limit. Worth reading before you start prepping walls for paint in an older house.
Ventilation matters for fumes as much as dust. EPA notes that indoor VOC concentrations run consistently higher indoors than out — up to ten times higher — and recommends maximum ventilation while painting. These gases leak even from closed containers: store solvents in the garage, not under the kitchen sink.
Electrical work has one rule. NIOSH’s electrical safety guidance puts it simply: de-energize circuits before doing any type of work, and use an AC voltage tester to verify the power is off. Written for workplaces, but it is the same physics in a hallway. Test your tester on a circuit you know is live first — non-contact testers fail silently, and a flat battery reads exactly like a dead wire.
What I would skip
The 137-piece socket set. You will use six sockets. Buy a small metric and SAE set the day a job needs one.
A cheap stud finder. The $15 ones find studs, pipes and your own hand with equal confidence. Run a strong magnet along the wall to locate drywall screws instead — free, and more reliable.
A laser level, at first. Useful for tiling and gallery walls, idle for the first year.
A pressure washer. Rent it. Most homes want one twice a year, and a stored unit cracks in an unheated garage.
Oscillating multi-tools are the honest edge case: the only sane way to flush-cut door casings, but slow, and no substitute for a saw. Buy one when you meet that job.
When to put the tools down
A tool kit is not a licence. Three places are worth stopping.
Anything behind the panel. Swapping a fixture or a switch on a circuit you have confirmed dead is reasonable homeowner work. Adding a circuit, opening the service panel, or working in a box of unfamiliar wiring is not.
Gas, and anything structural. Both are pass/fail rather than good/bad, and the failure modes are not recoverable.
Anything needing a permit. The International Code Council’s consumer safety guidance describes a permit as legal permission to build to approved drawings, and inspection as what keeps finished work at minimum standards of safety. Unpermitted work resurfaces at resale and can complicate an insurance claim — a peculiar way to lose money on a job you did for free.
Be honest about the economics. On a full kitchen at $25,000 to $60,000 and up, or a mid-range bathroom at $5,000 to $12,000, your own tools save a few hundred dollars of prep labour at most; the money sits in cabinets, fixtures and trades, as our kitchen remodel cost breakdown sets out, and these ranges move with region and scope. A kit pays on the long tail instead: a running toilet, a sticking door, a failed caulk line, an extractor fan needing proper ducting to the outside rather than the attic. Twenty of those over five years is real money.
Building it in the right order
- Week one, around $120: tape, both levels, screwdrivers, hammer, utility knife, pliers, adjustable wrench, voltage tester.
- Month one, around $200: drill/driver with two batteries, bit set, caulk gun, step ladder, safety glasses, hearing protection, N95s.
- When a project demands it: impact driver, circular or mitre saw, P100 respirator, shop vacuum, extension cord.
Buy the fourth wave never. That is the wave where people buy tools for jobs they intend to do someday, and someday has a poor completion rate.
Everything after follows the project. The cost research and project guides on HomePlusDeals.Com work on the same principle: establish what the job actually needs before anything goes in the cart. Our household tips go deeper as the work gets bigger.
Heads up: this article may contain affiliate links. If you buy through them we may earn a small commission at no extra cost to you — it never changes what we recommend. Full details in our privacy policy.